First Time 3D Printing
I was surprised to realize that, despite two years of robotics education, I hadn’t been motivated to learn about 3D printing. I didn’t really have a chance to print anything for my classes, and I couldn’t see how it’d be useful for me.
Recently, I figured out that I could use 3D printing to resolve the issue with the annoyingly long cords of my webcam and microphone by making my own stands and mounts. So, in this post, I’m going to share my journey of diving into 3D printing for the first time.
Results
| Camera Stand | Microphone Stand |
|---|---|
 |
 |
What do you need to get start
Hardware
I primarily use Creality Ender-3 V3 SE, which is one of the best beginner-level 3D printers available today. It’s surprisingly easy to use. To get started on this journey, you’ll need a few things: a 3D printer (like the Ender-3), 3D printing filament, an SD card, and a laptop equipped with drawing software.
Software
- Fusion 360 (Need license): a CAD software creates the digital 3D model of the object you want to print.
- Usually you would export the drawing with
.stltype, which cannot be loaded directly to the printer.
- Usually you would export the drawing with
- Ultimaker Cura (FREE): a slicing software takes the 3D model and translates it into G-code, which is the language that 3D printers understand.
- By using Cura, you can export
.gcodefile which can be loaded directly to the printer.
- By using Cura, you can export
The workflow starts with you creating designs in Fusion 360. Once you’ve completed a design, you export it as an .stl file to your laptop. Next, import this .stl file into Cura, where you’ll slice the model and configure your preferred printing settings. After that, you export the final design as a .gcode file onto your SD card. Now, you can insert the SD card directly into your 3D printer and wait for your creation to materialize.
Personally, I find the slicing software quite intuitive, provided you’re familiar with the terminology. However, the drawing aspect can be challenging. There are times when it’s frustratingly difficult to create the shape you want, or you can’t find the appropriate tool. YouTube tutorials are a great resource, but even with their help, my drawing skills are currently limited to using basic tools. An expert might accomplish in one click what takes me several attempts.
What did I make
Microphone Stand
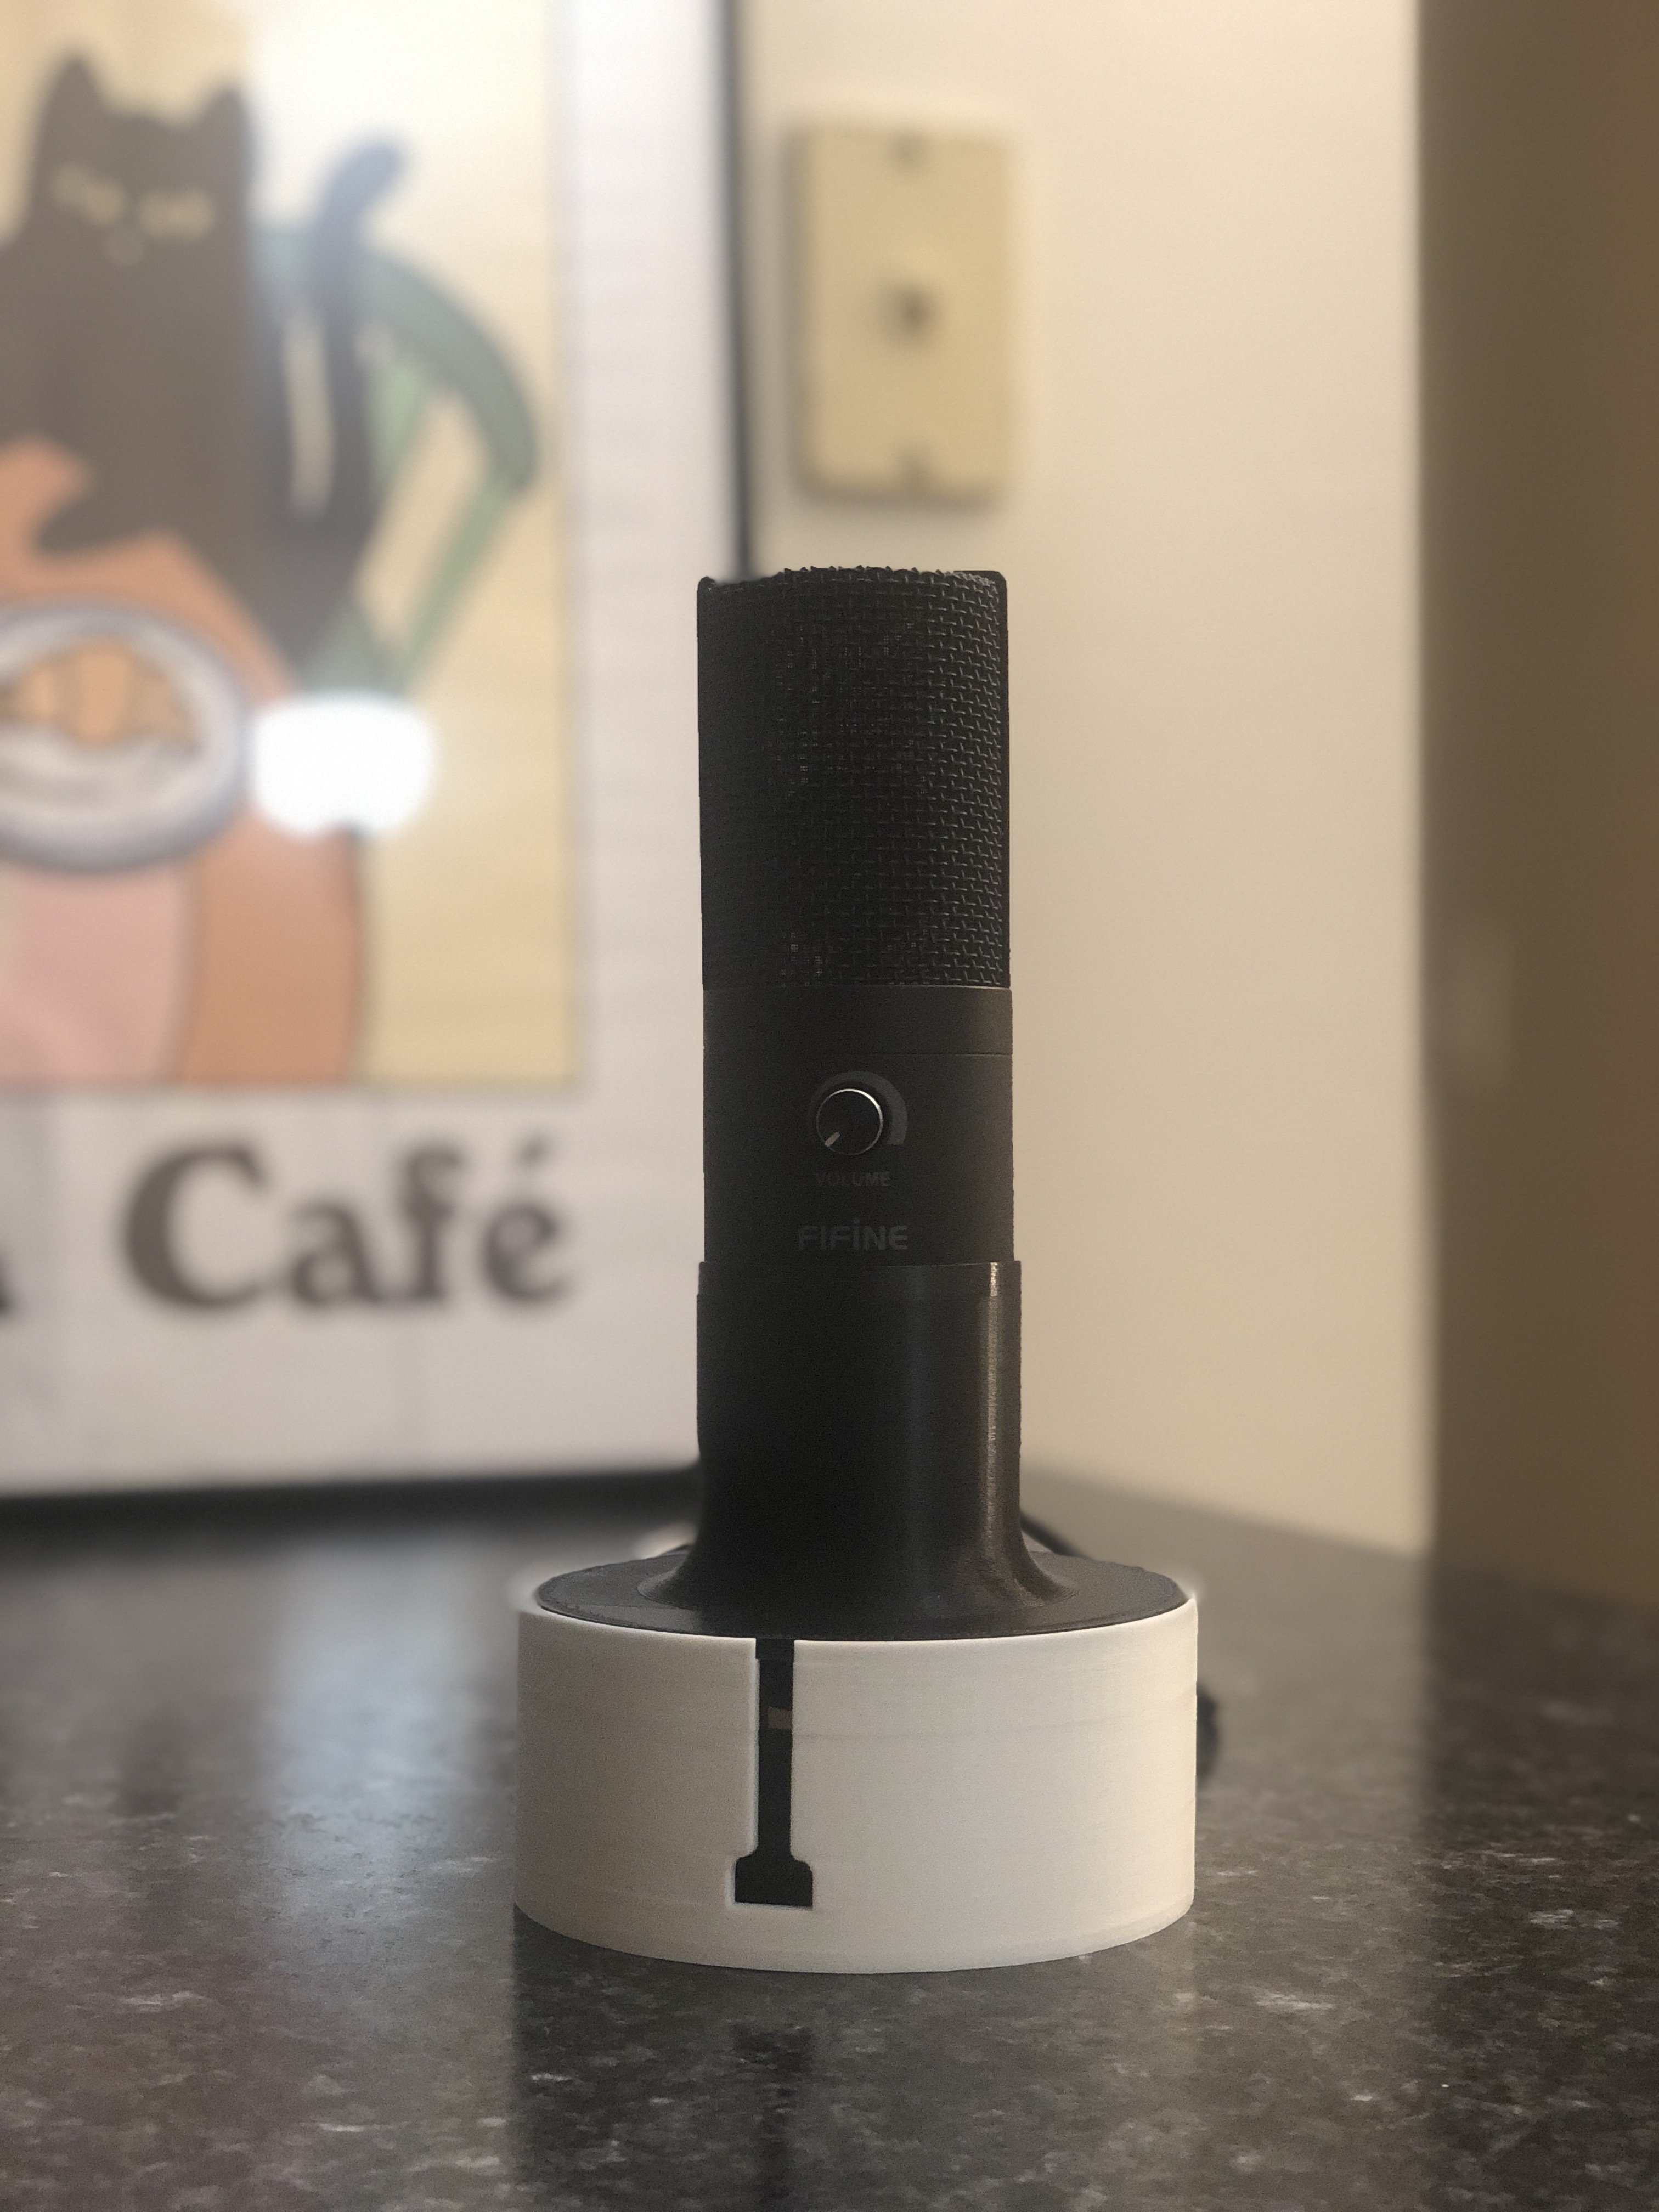
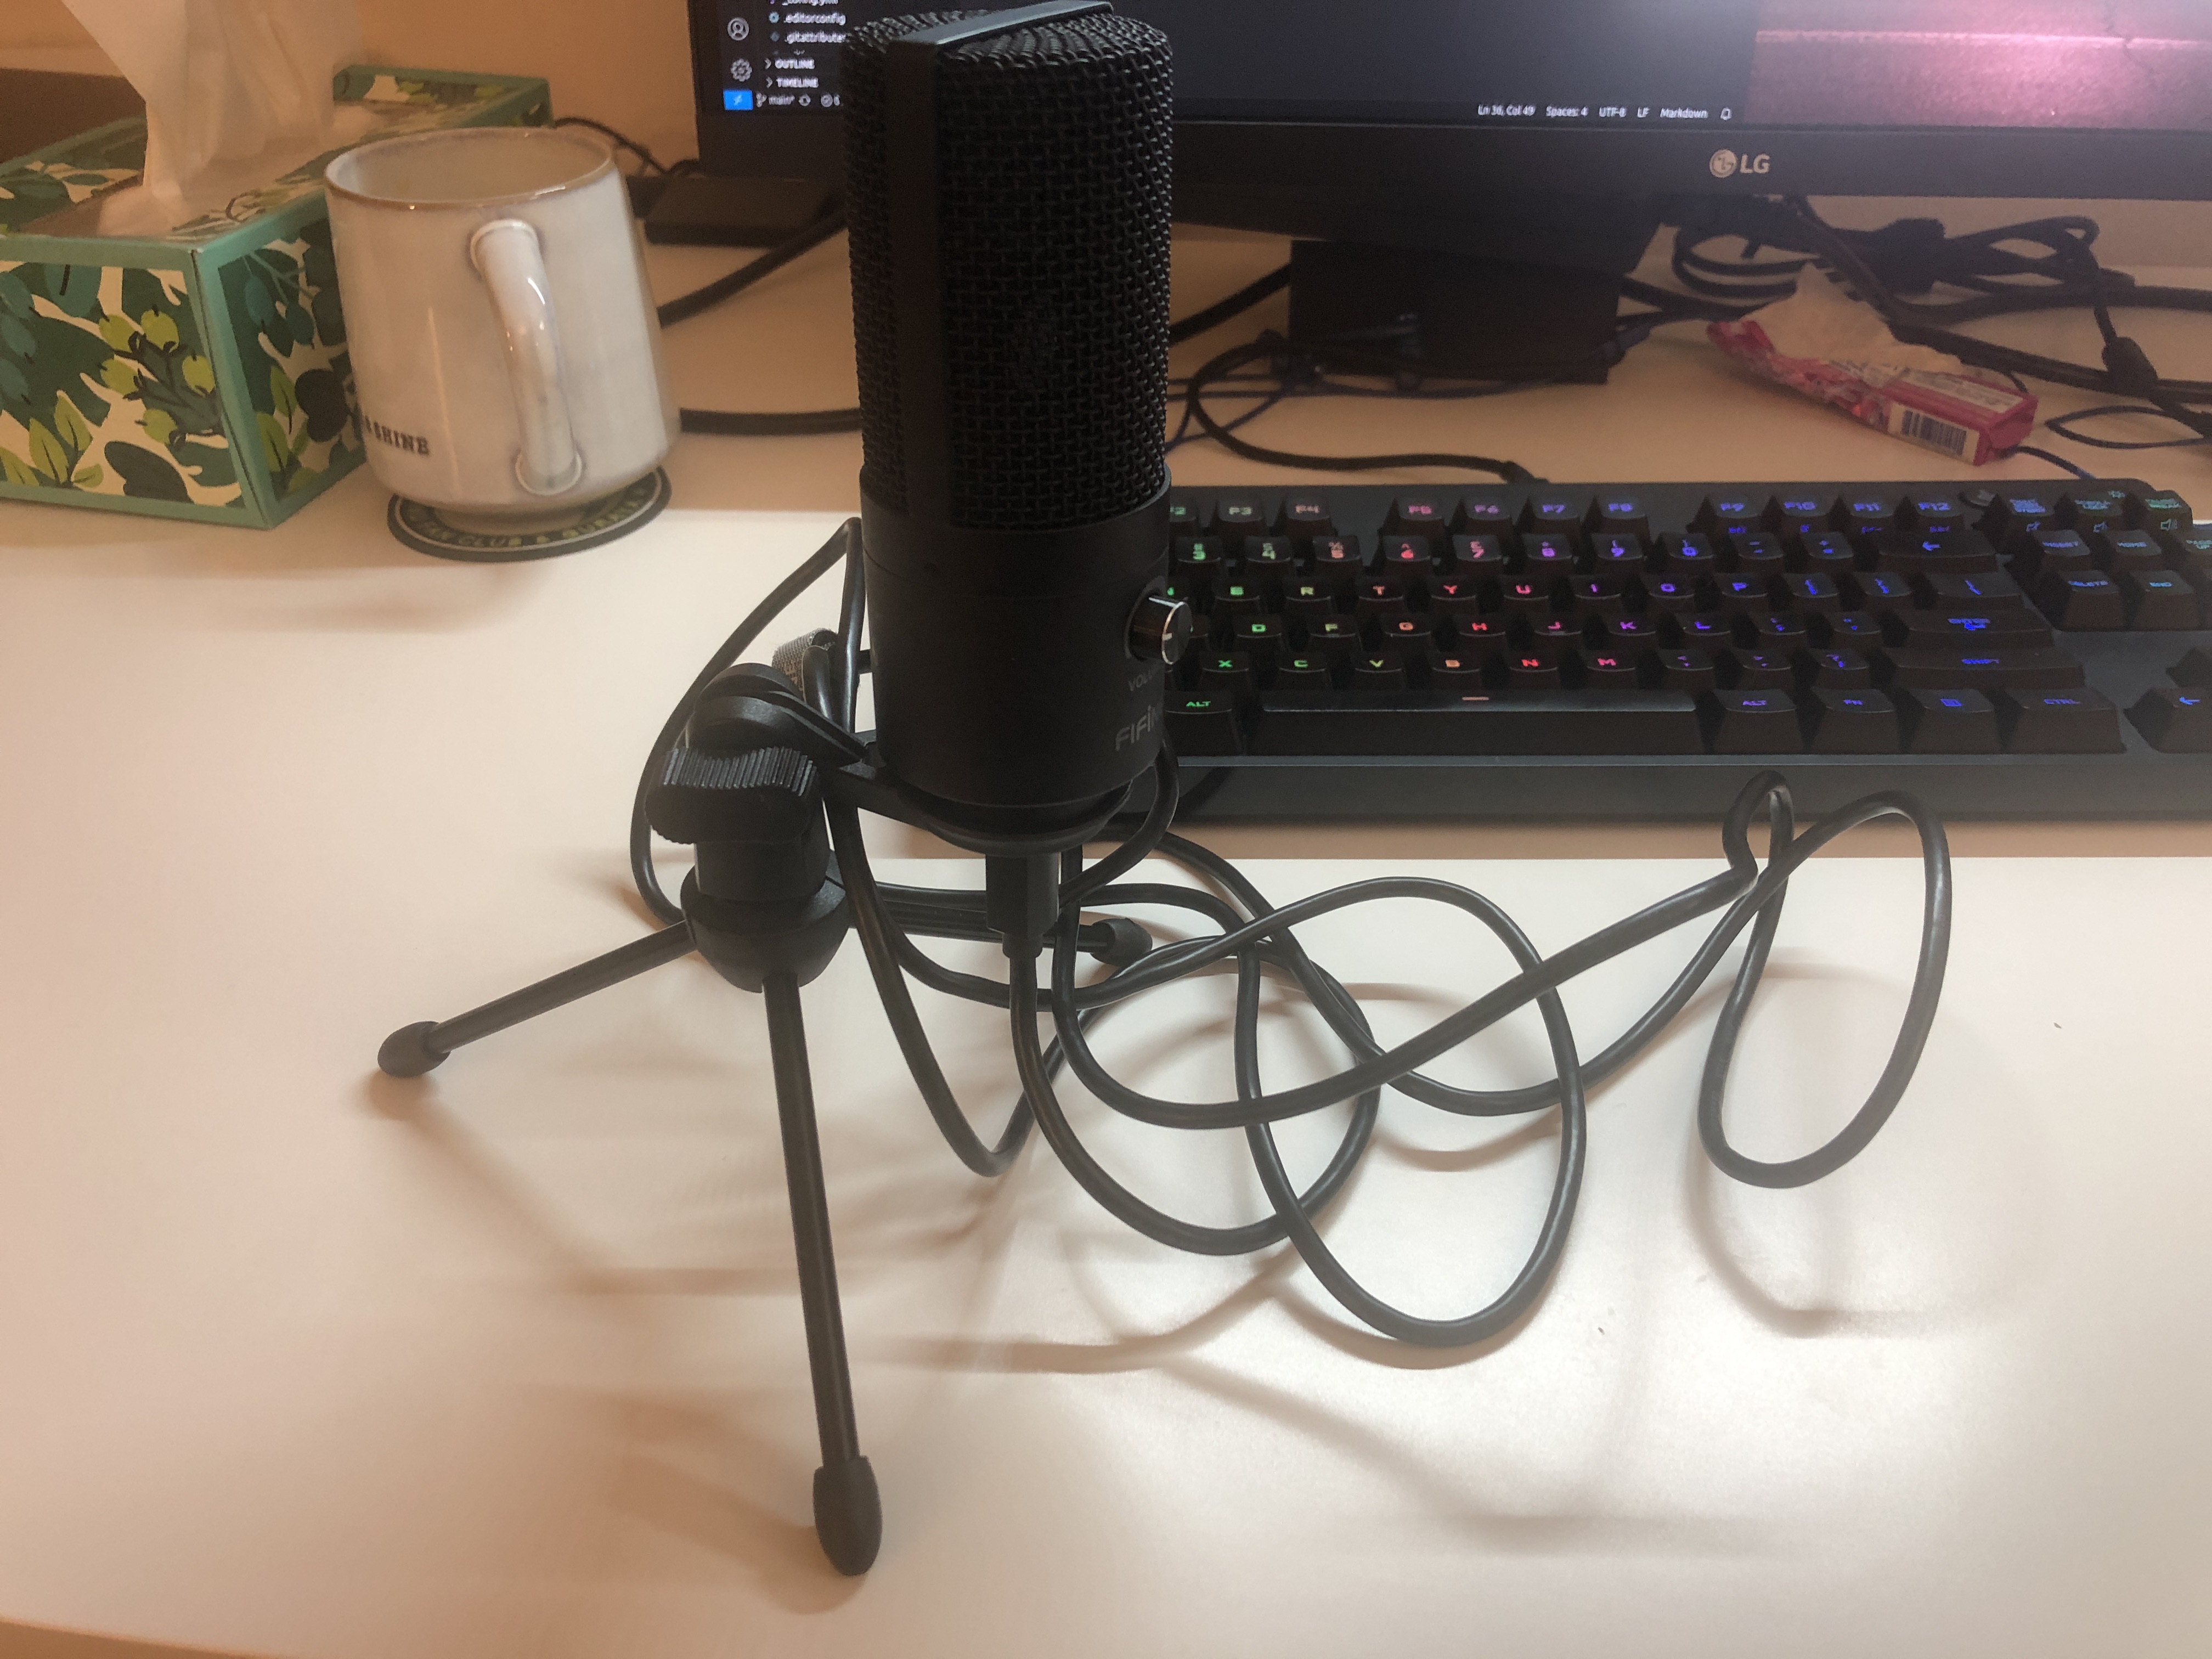
One major issue with my microphone is the thick long cord, which is not only cumbersome but also aesthetically displeasing. Additionally, the tripod base takes up a significant amount of desk space, which is less than ideal for my setup. While I’m not usually one to fuss over cable management, the exposed cord has become increasingly irritating.
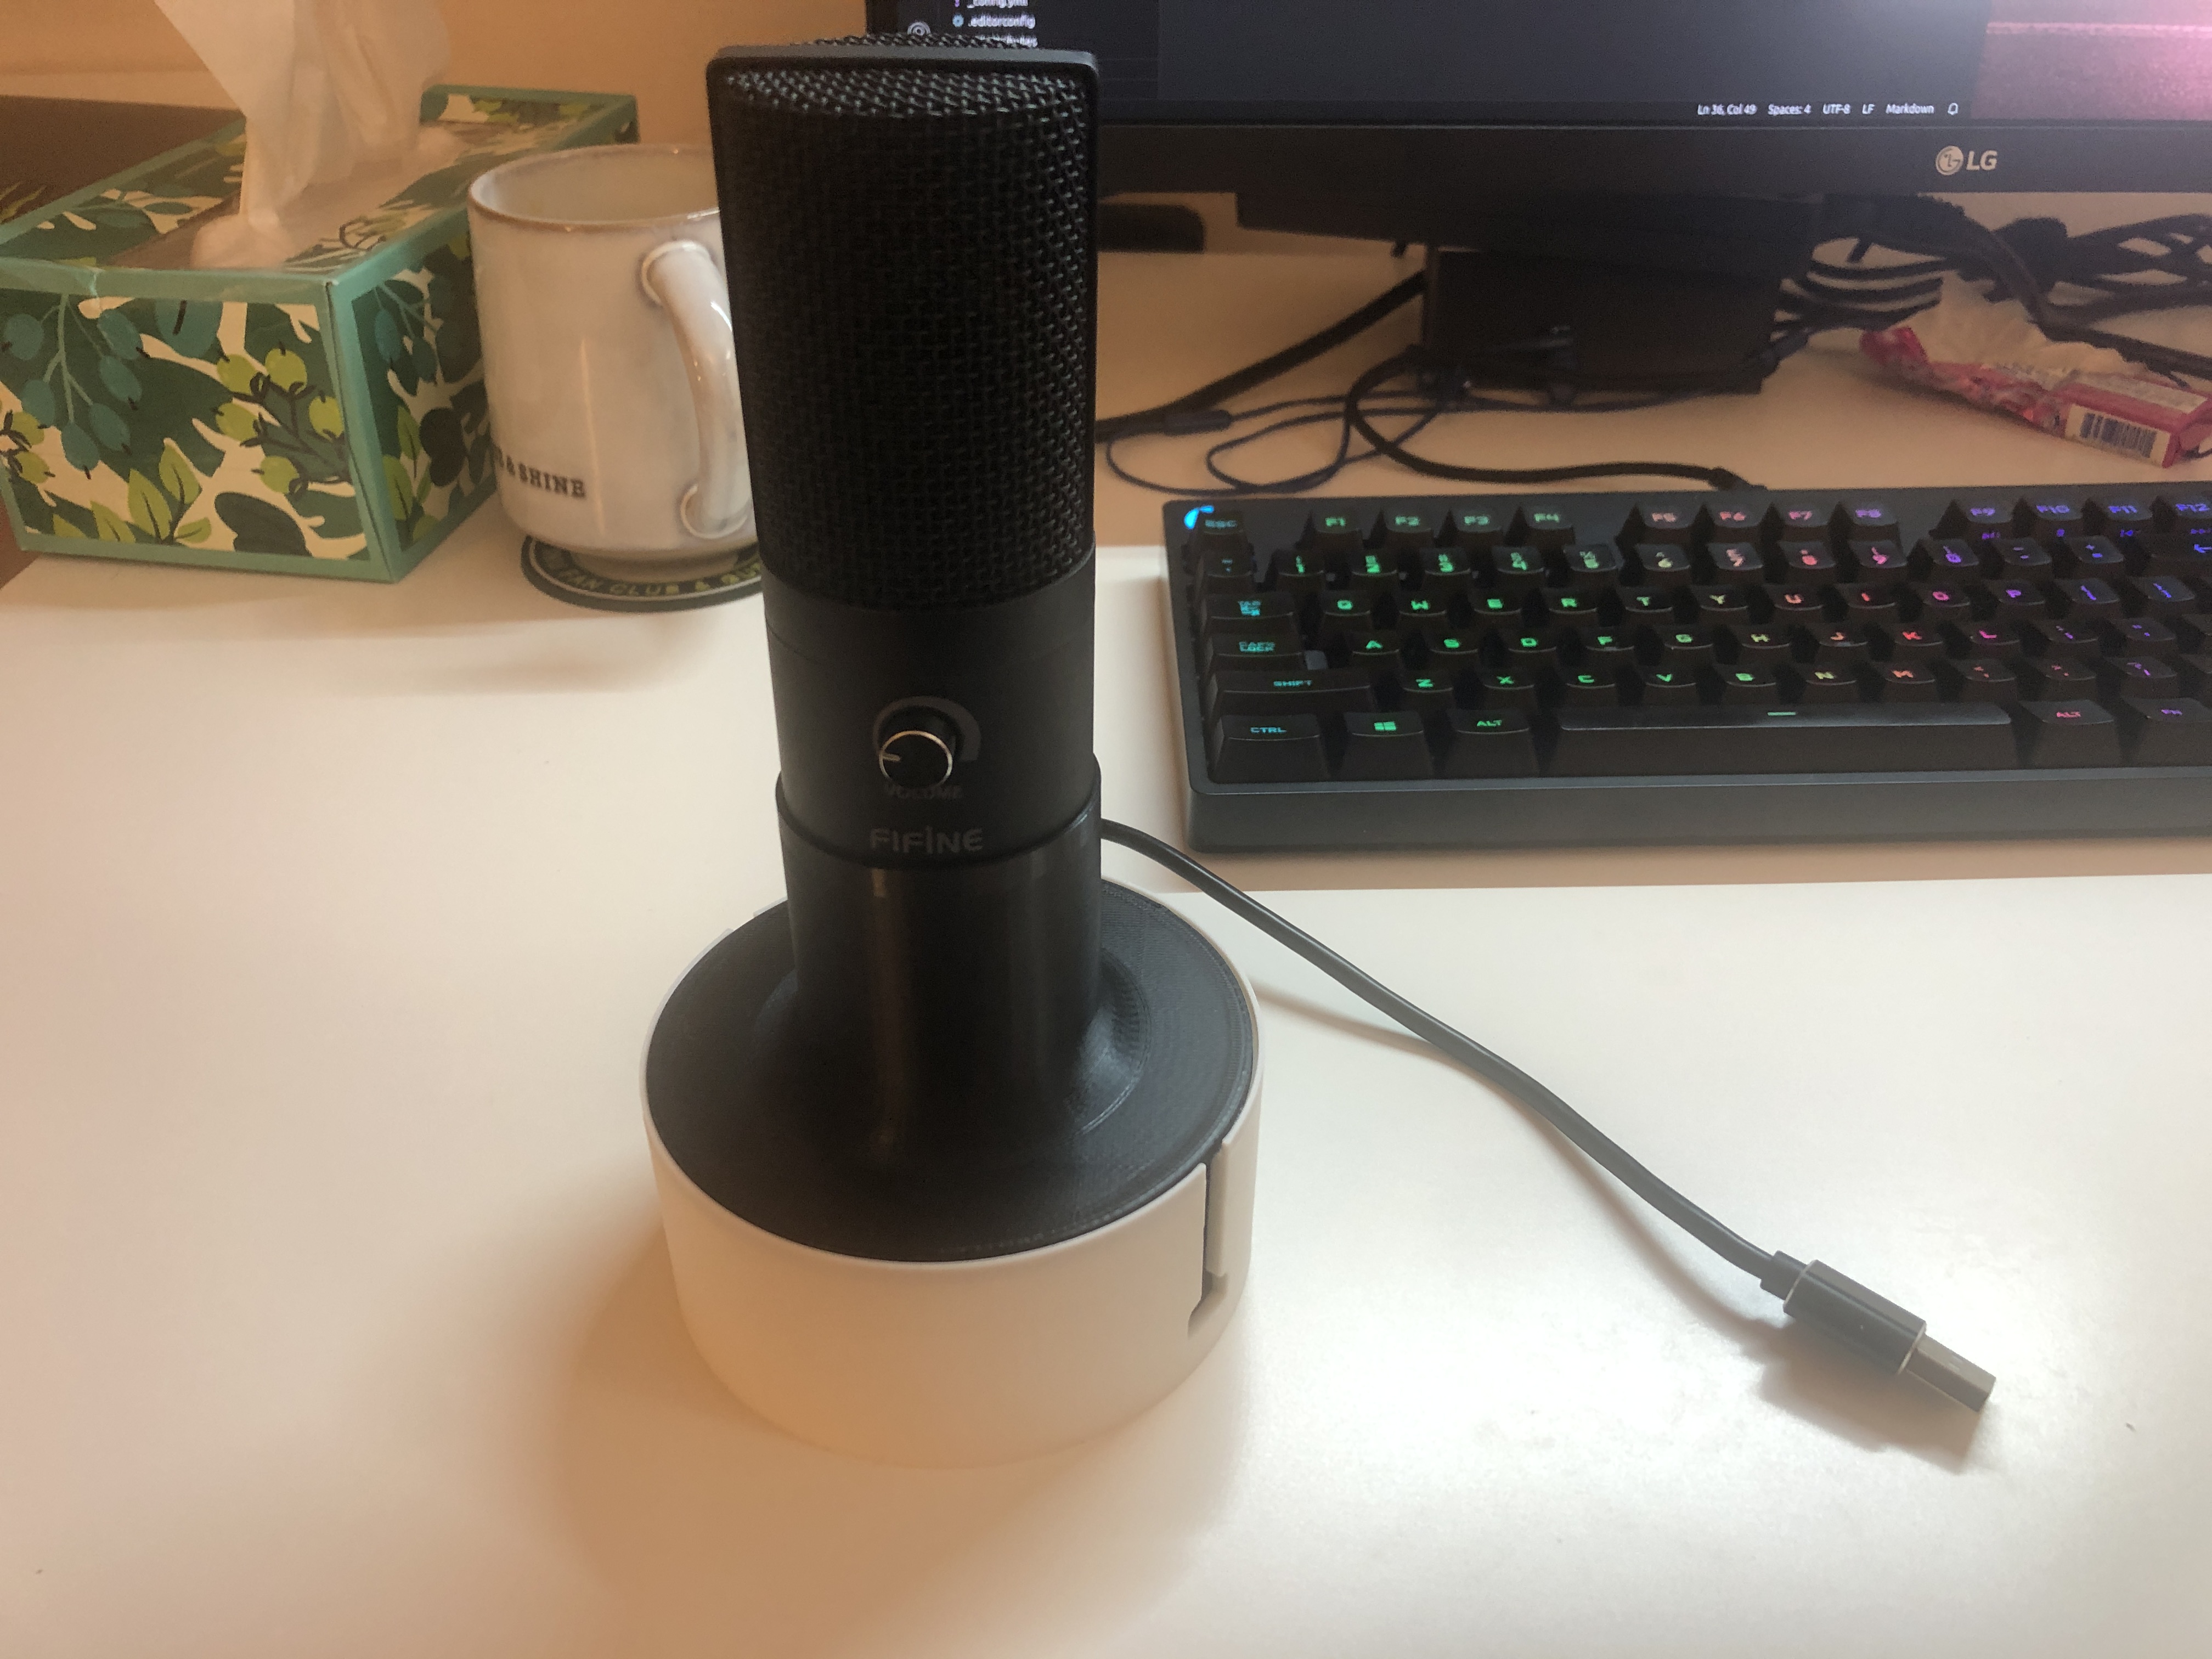
Firstly, I decided to replace the microphone’s stand, and the outcome was quite pleasing. Take a look at the results below, it already looks much better.
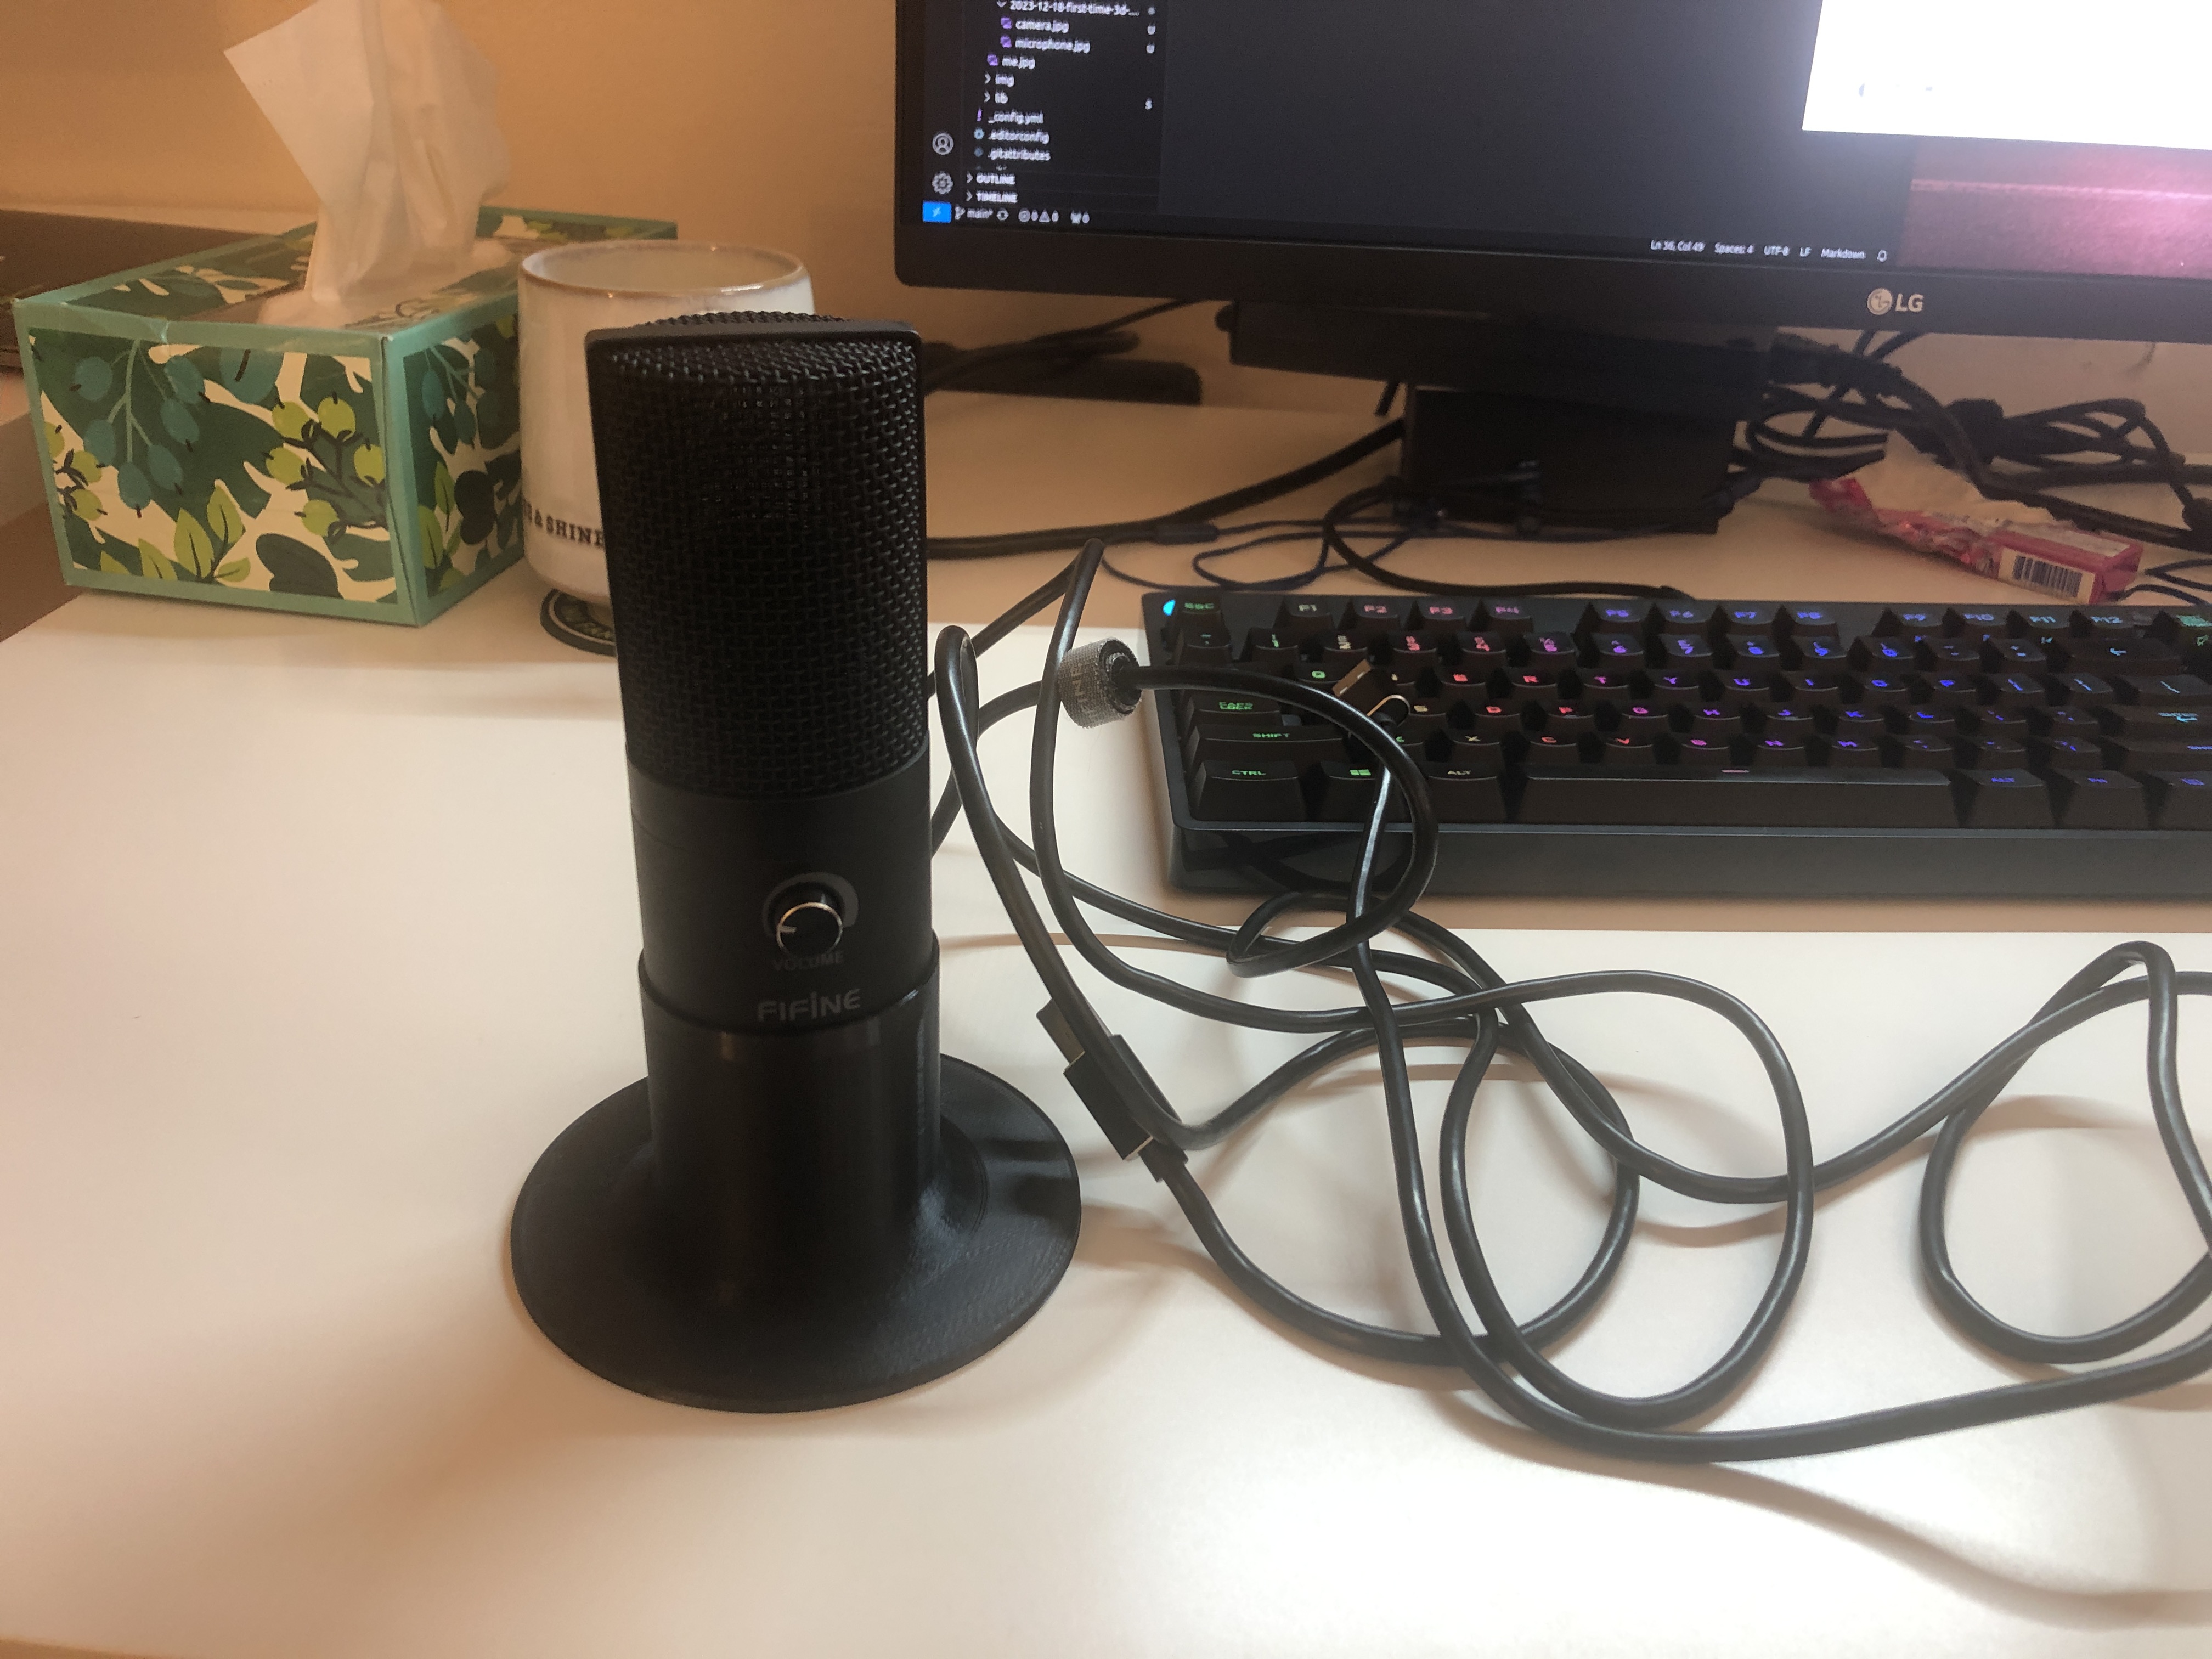
Next, I added a cord organizer at the base of the stand, and it looks cleaner!
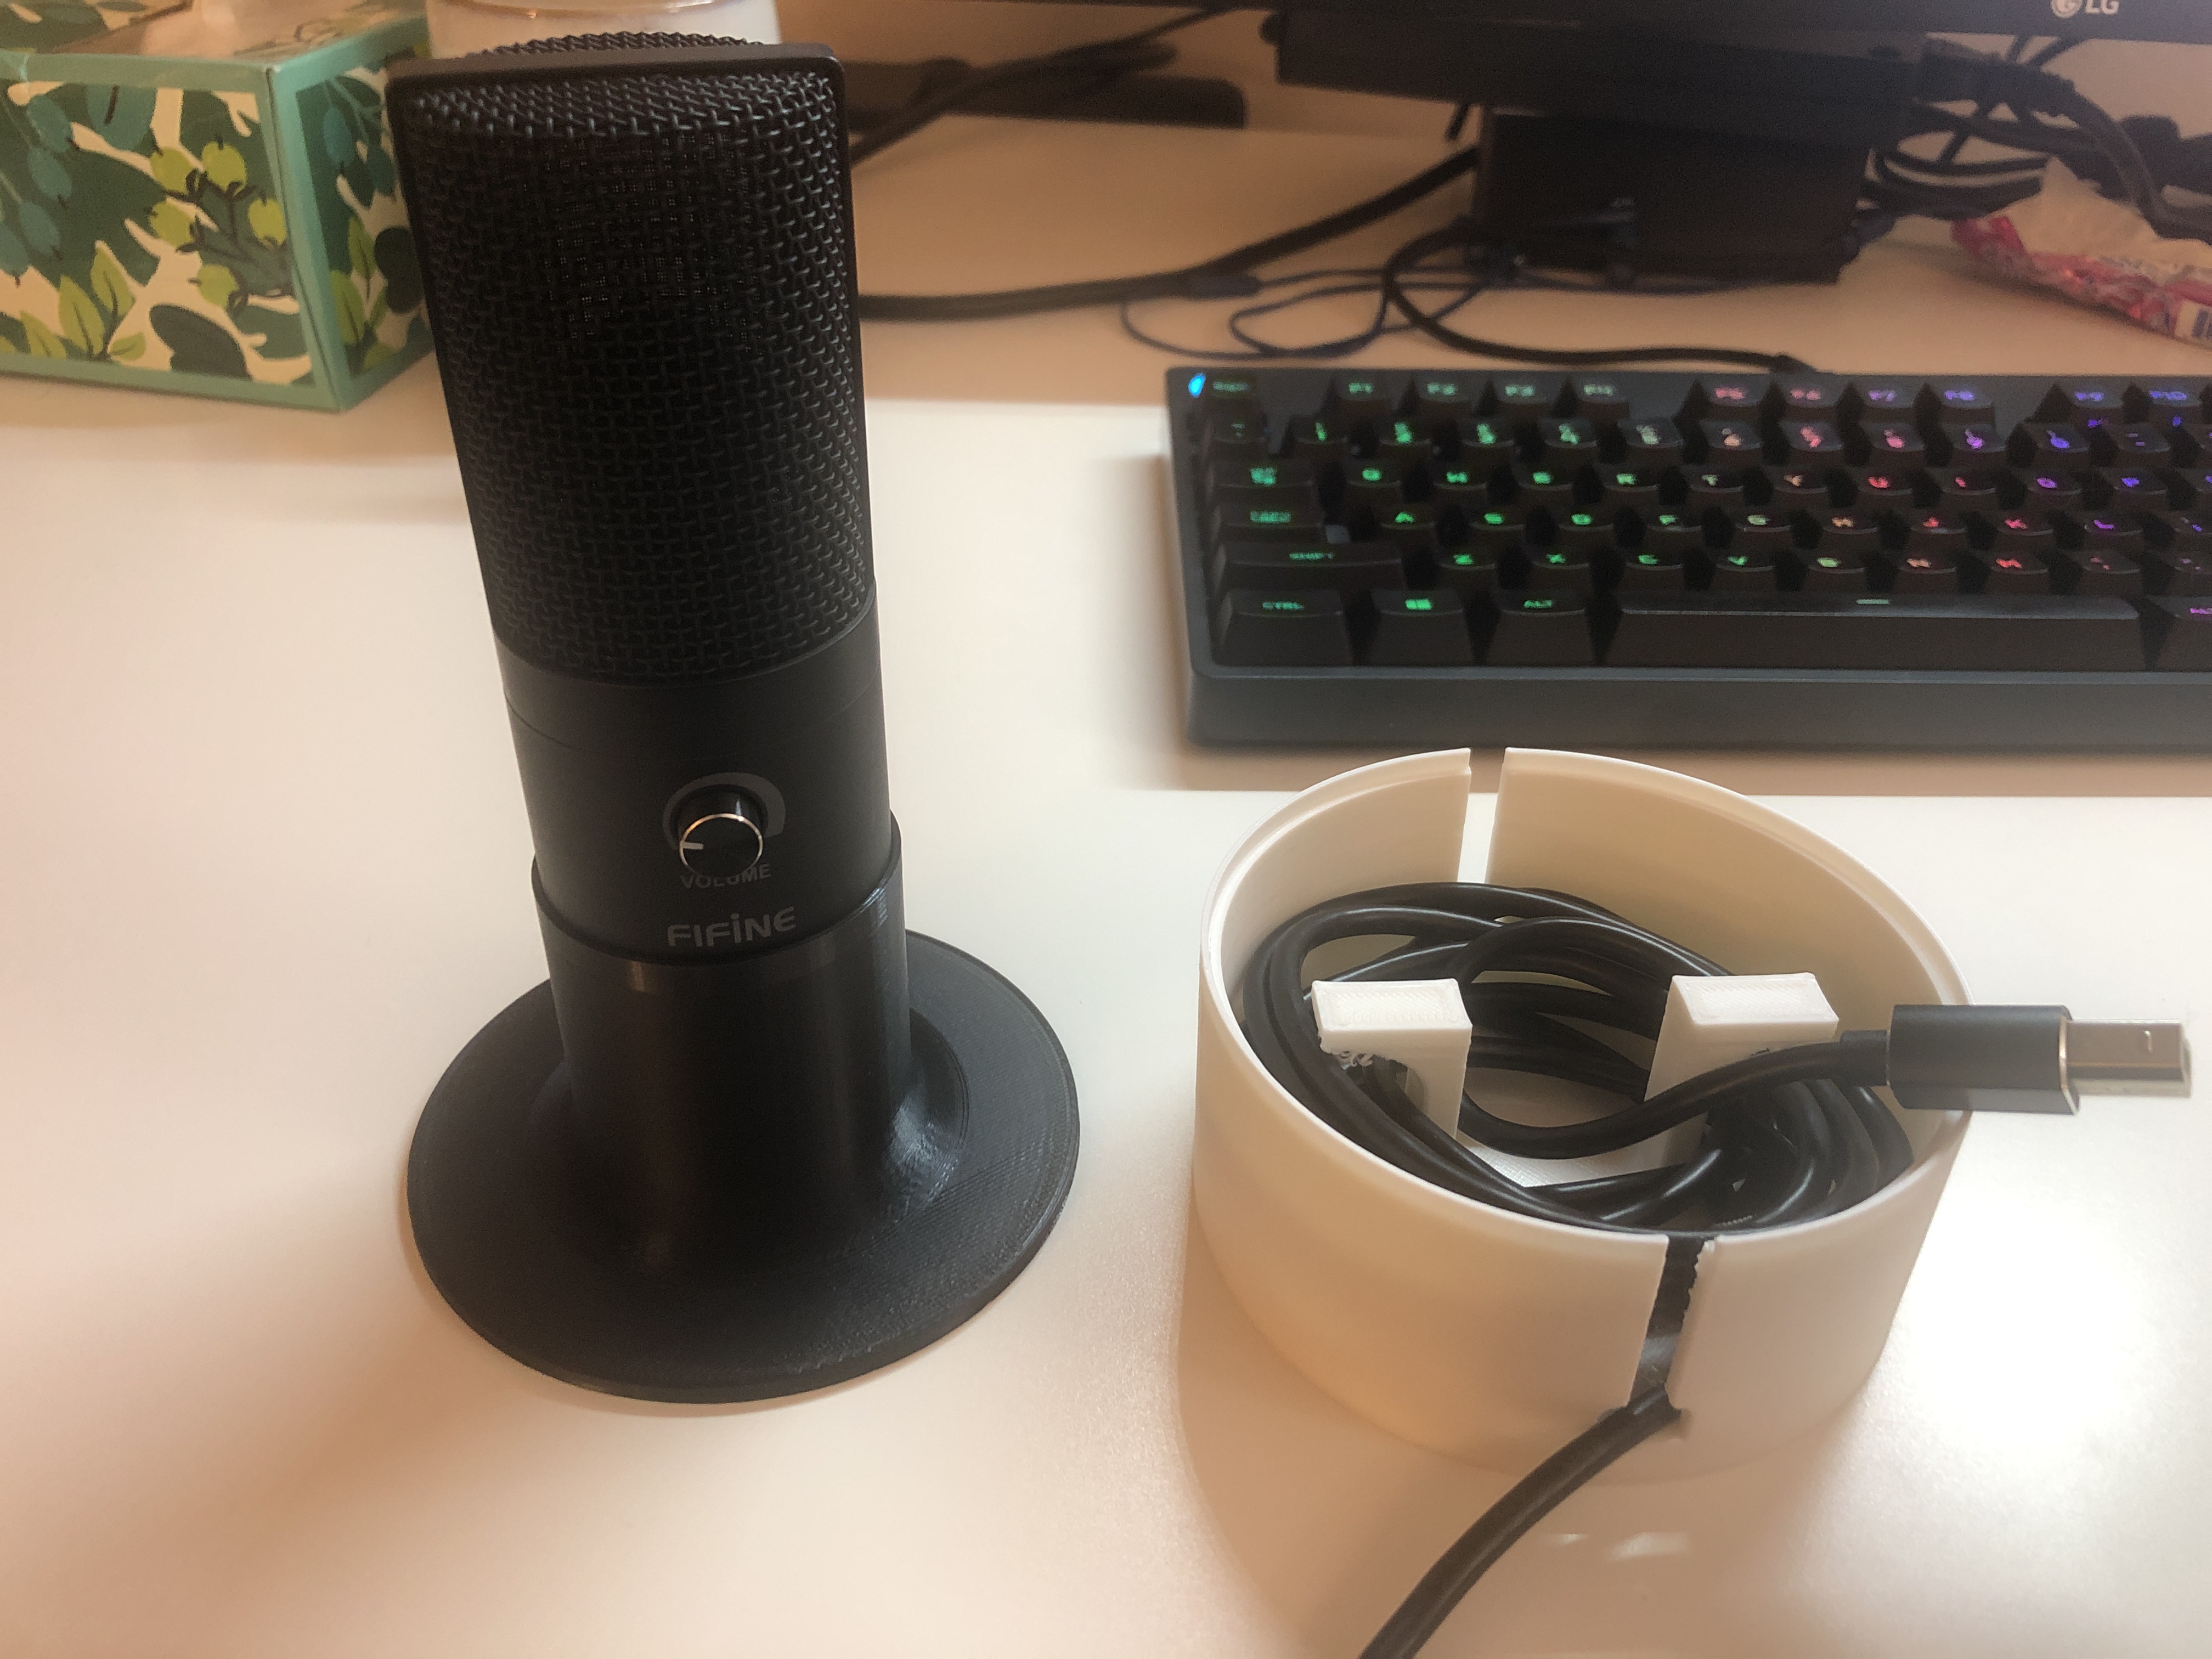
Eventually it looks like this when we put the two pieces together.
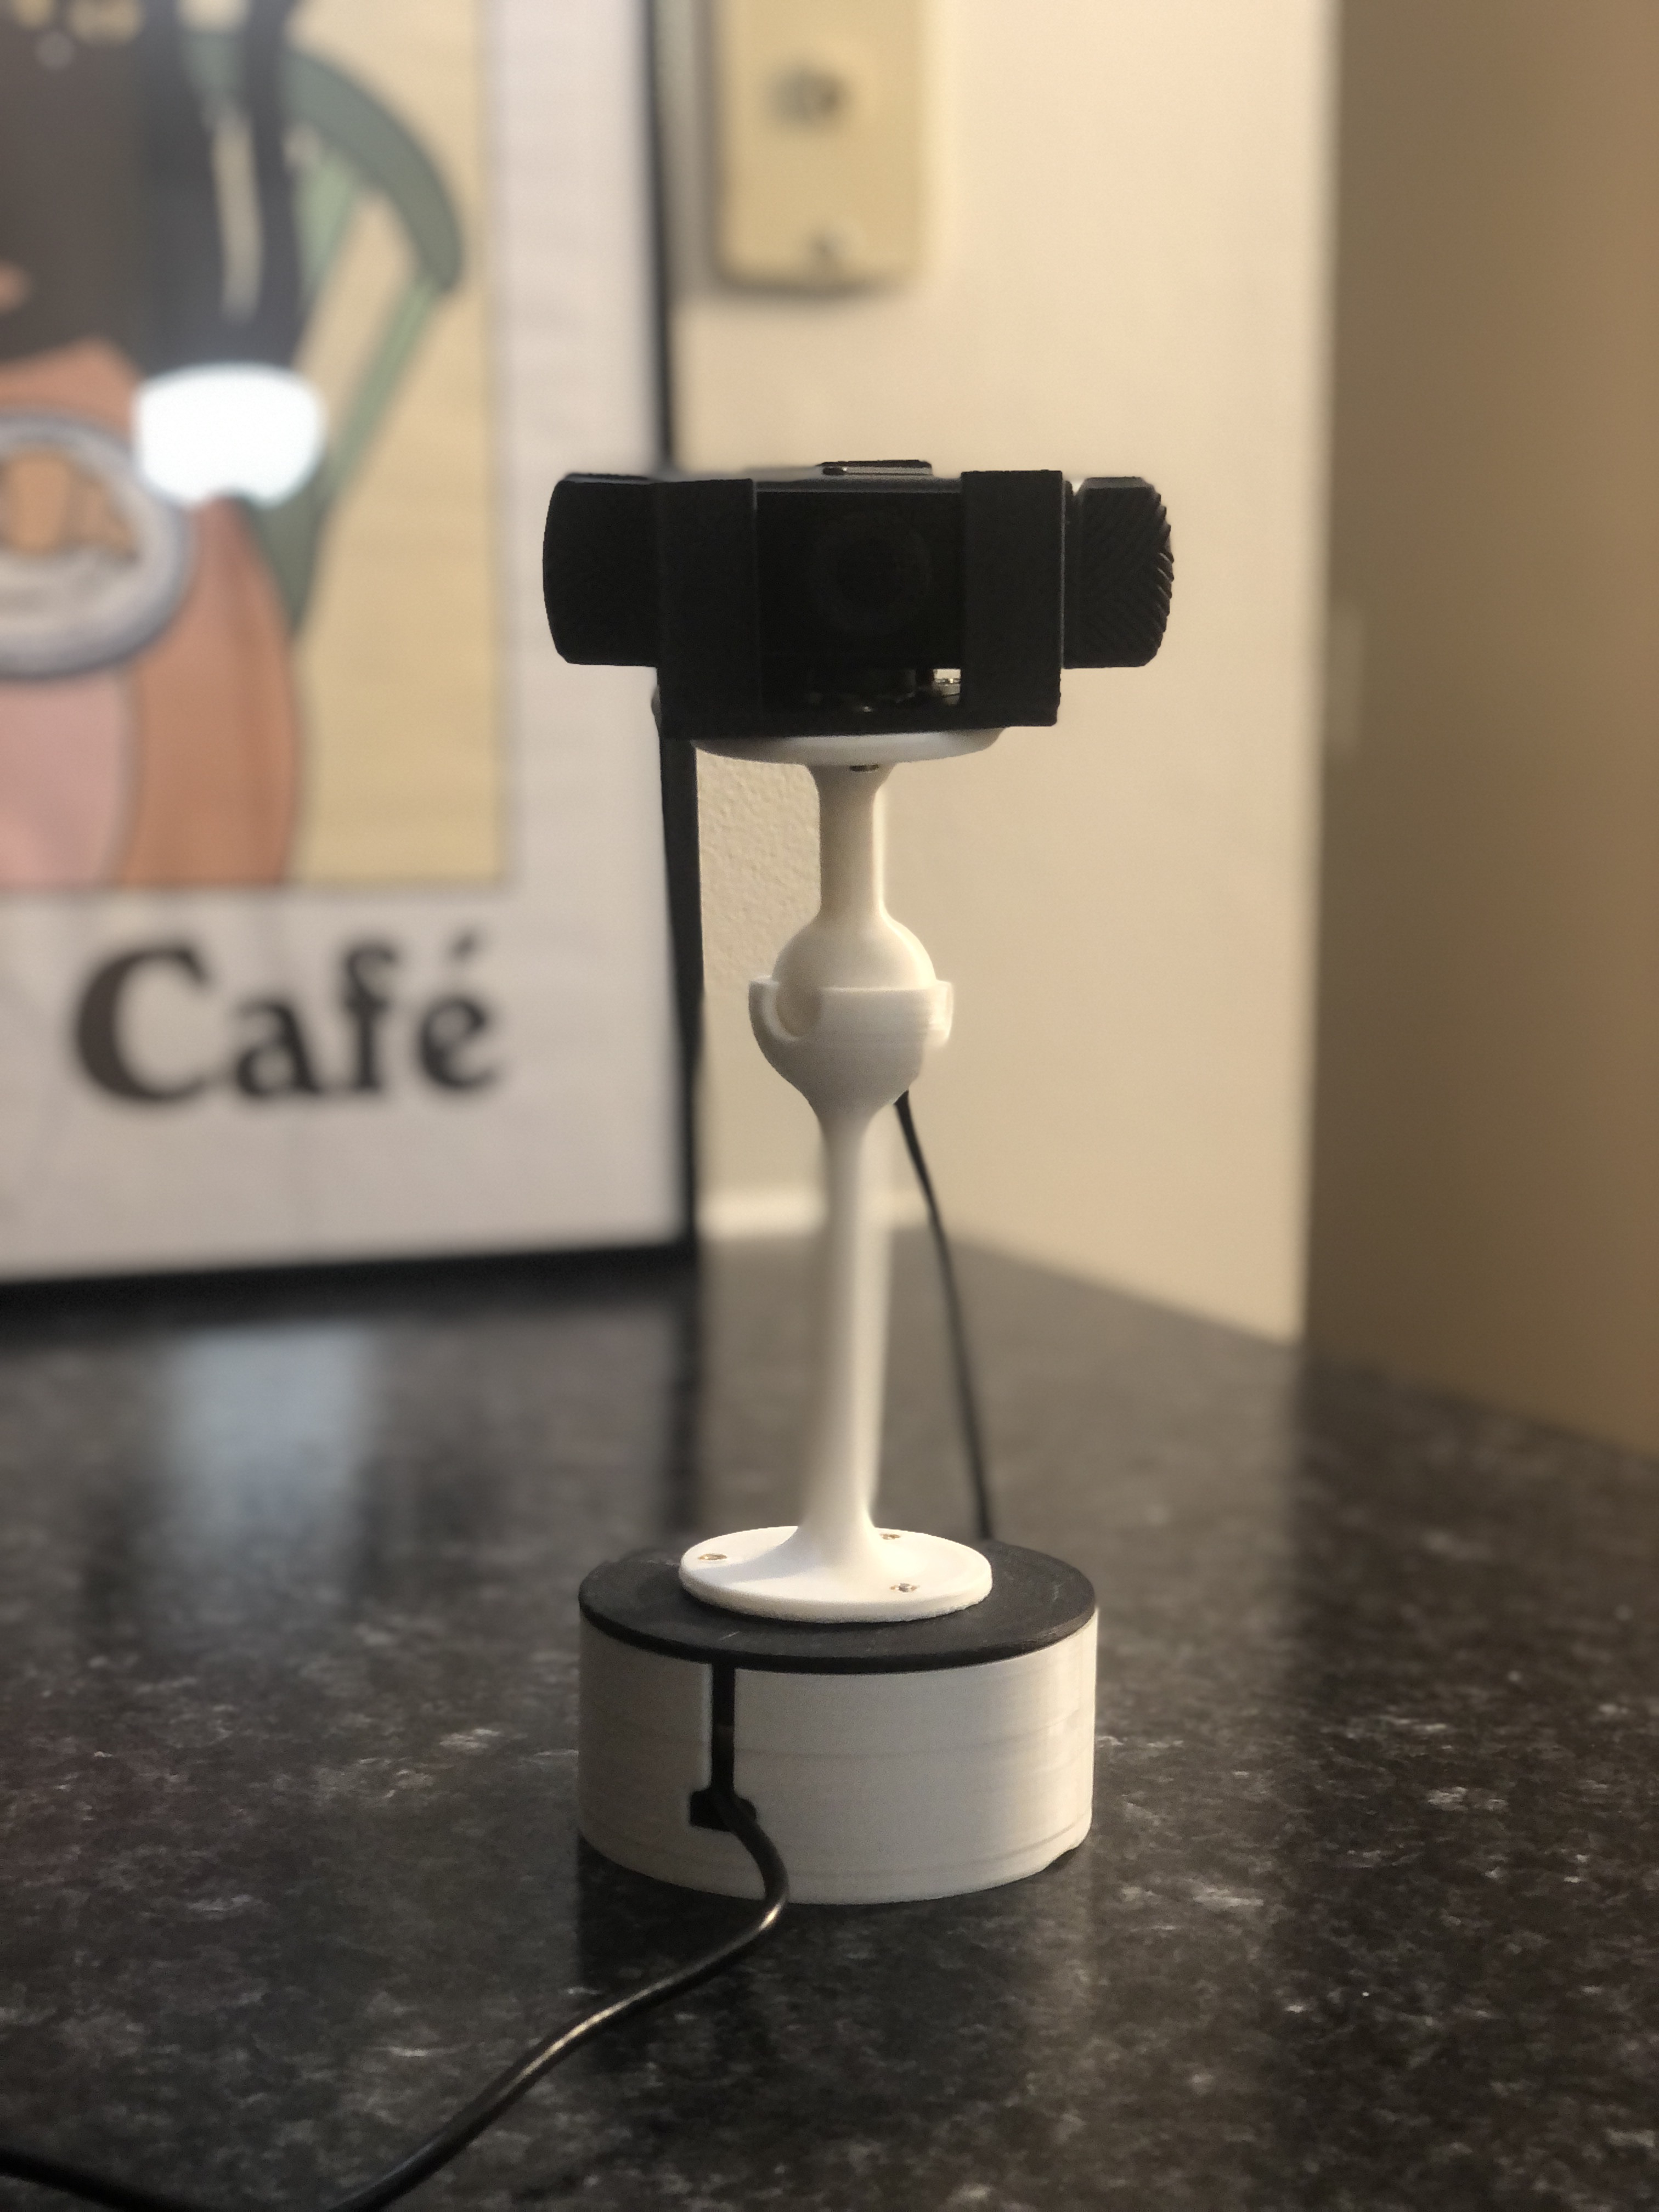
Webcam Stand
My webcam came with a clip for attaching it to the monitor, but it never really secured the camera in place, often resulting in an weird downward angle during Zoom meetings. This obviously needed to be changed.
The base of the webcam stand is similar to that of the microphone, featuring a cord organizer and a cap. The standout feature of this stand is the ball joint I added, which allows the top of the stand to move and be positioned at any angle I desire.
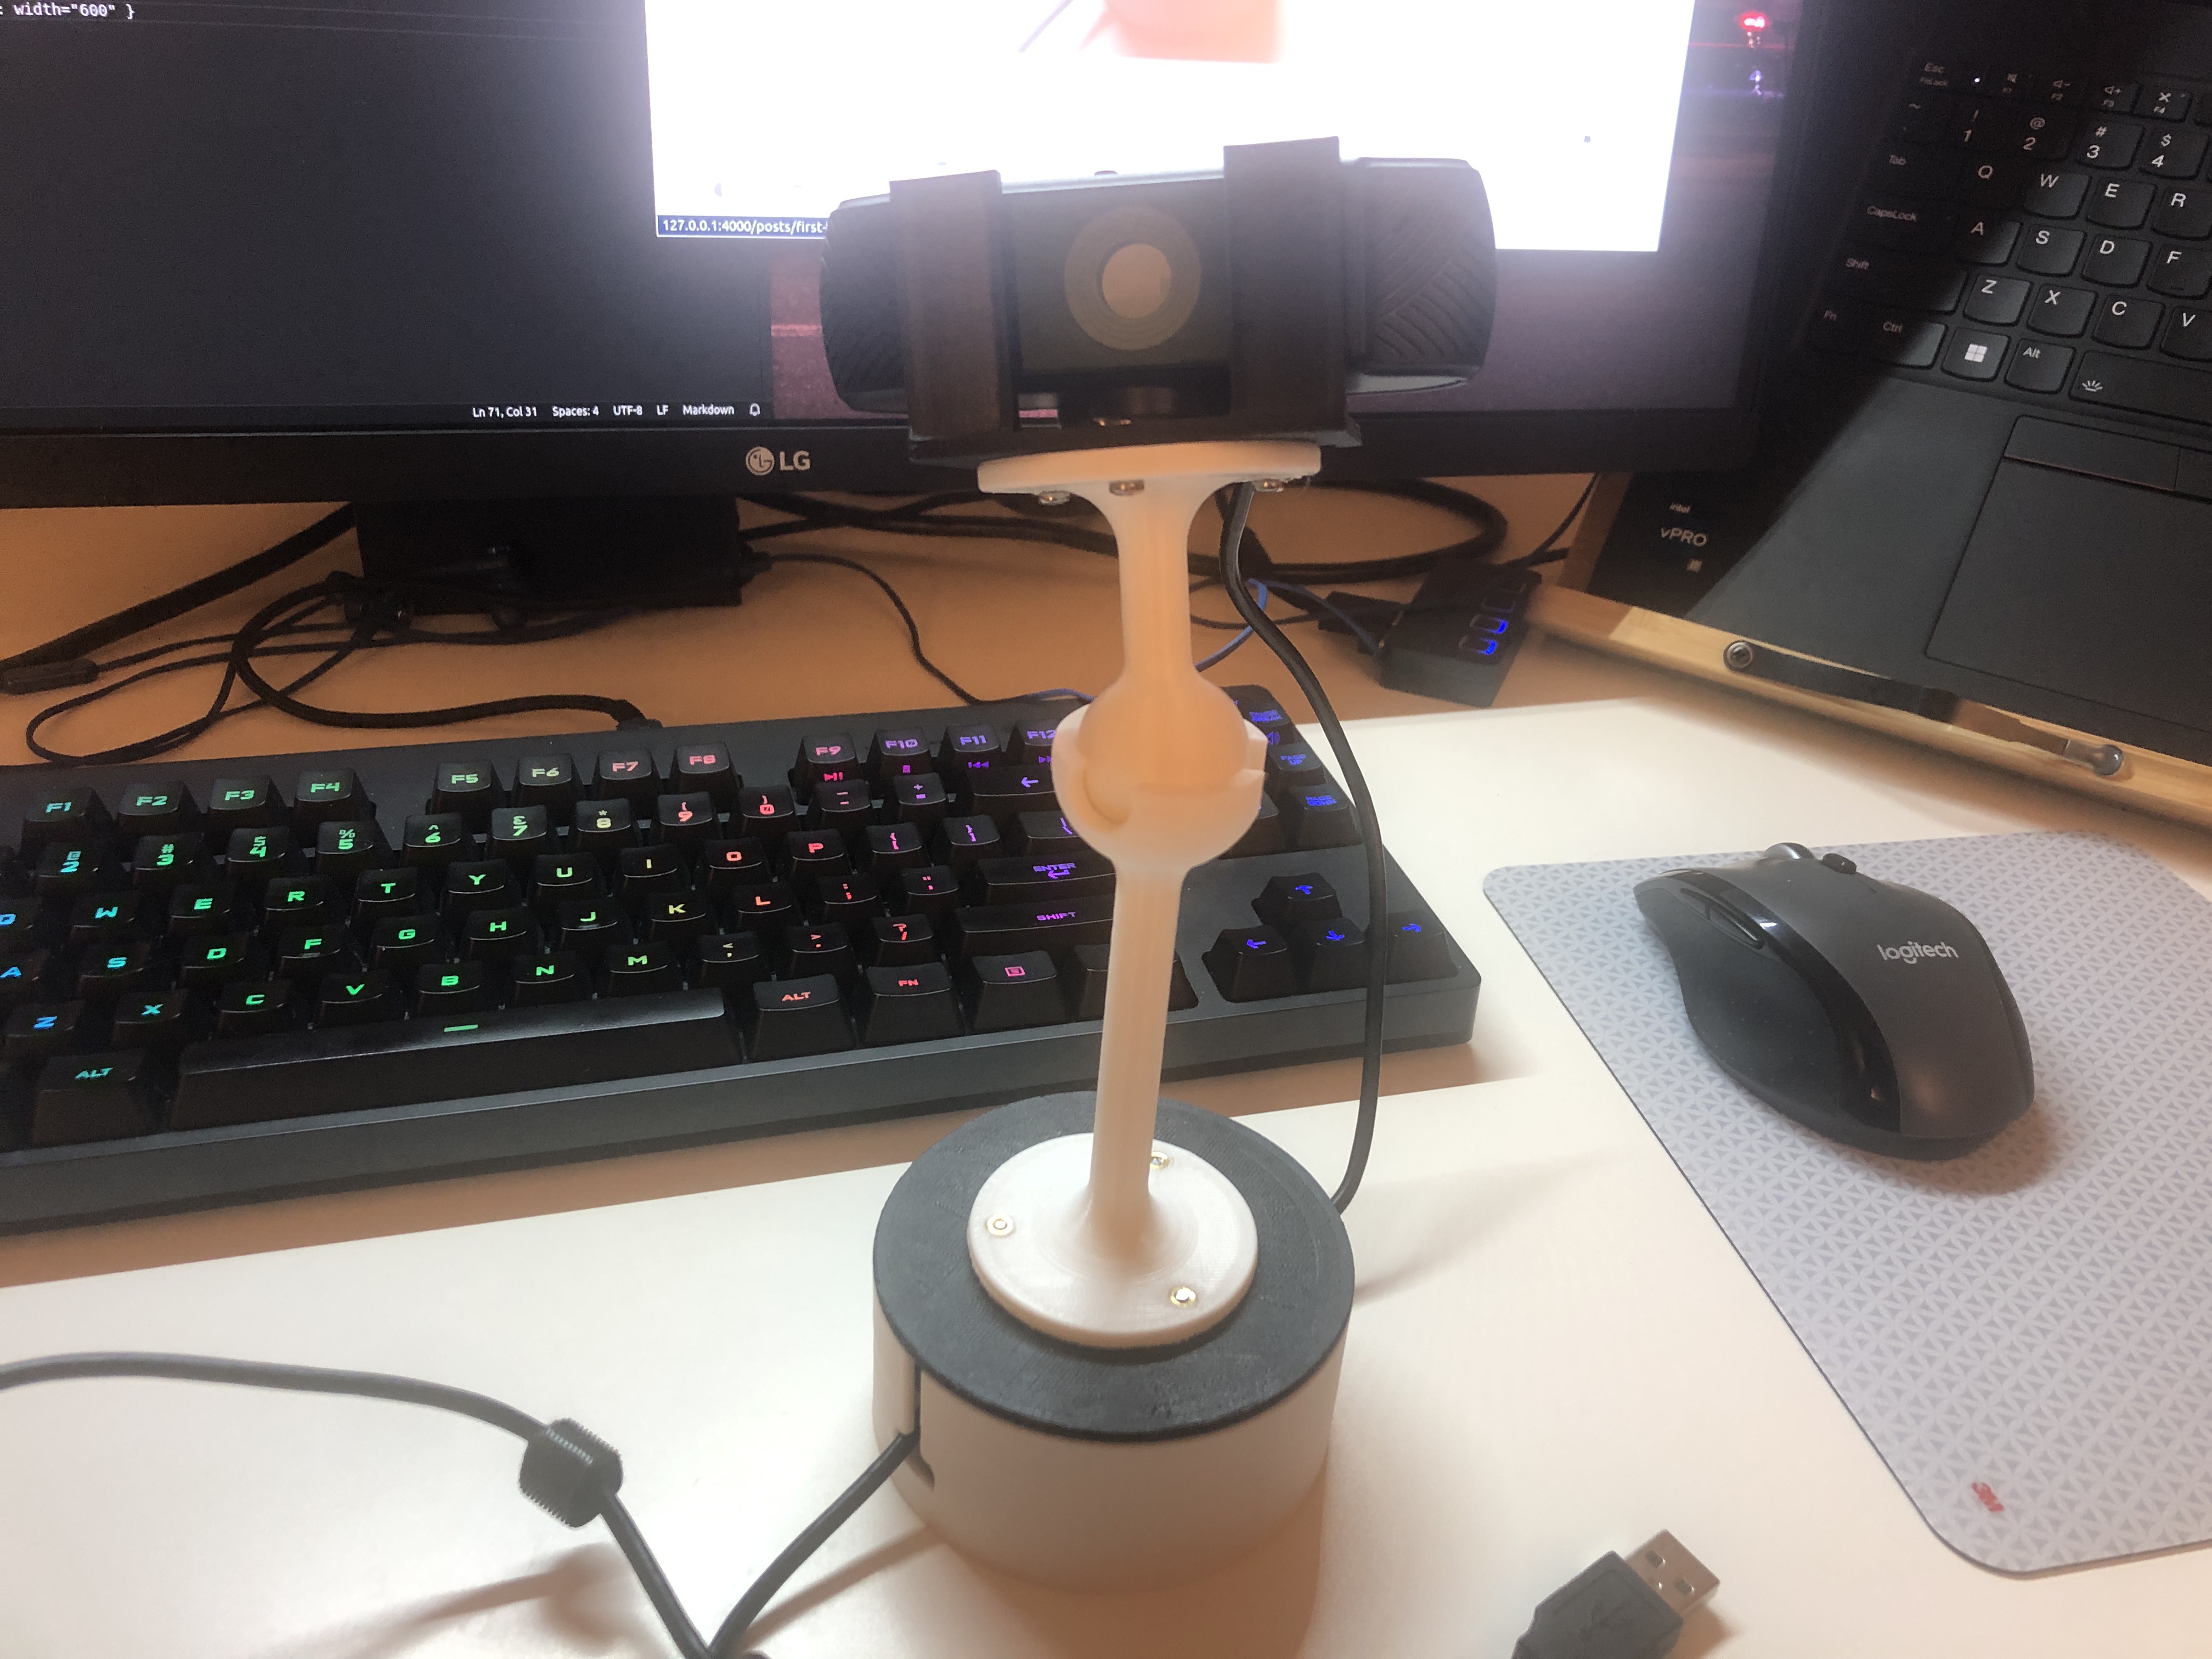
To attach the ball joint stand to the base, I used M2.5 threaded inserts and M2.5 x 8mm Screws.
Overall, I am very pleased with the outcomes of both setups and excited to build more!